
Easy Ripped Paper Tree Craft for the Whole Family is a fantastic activity for all ages.
Practice fine motor skills with your child without using any scissors! This is an entirely safe activity.
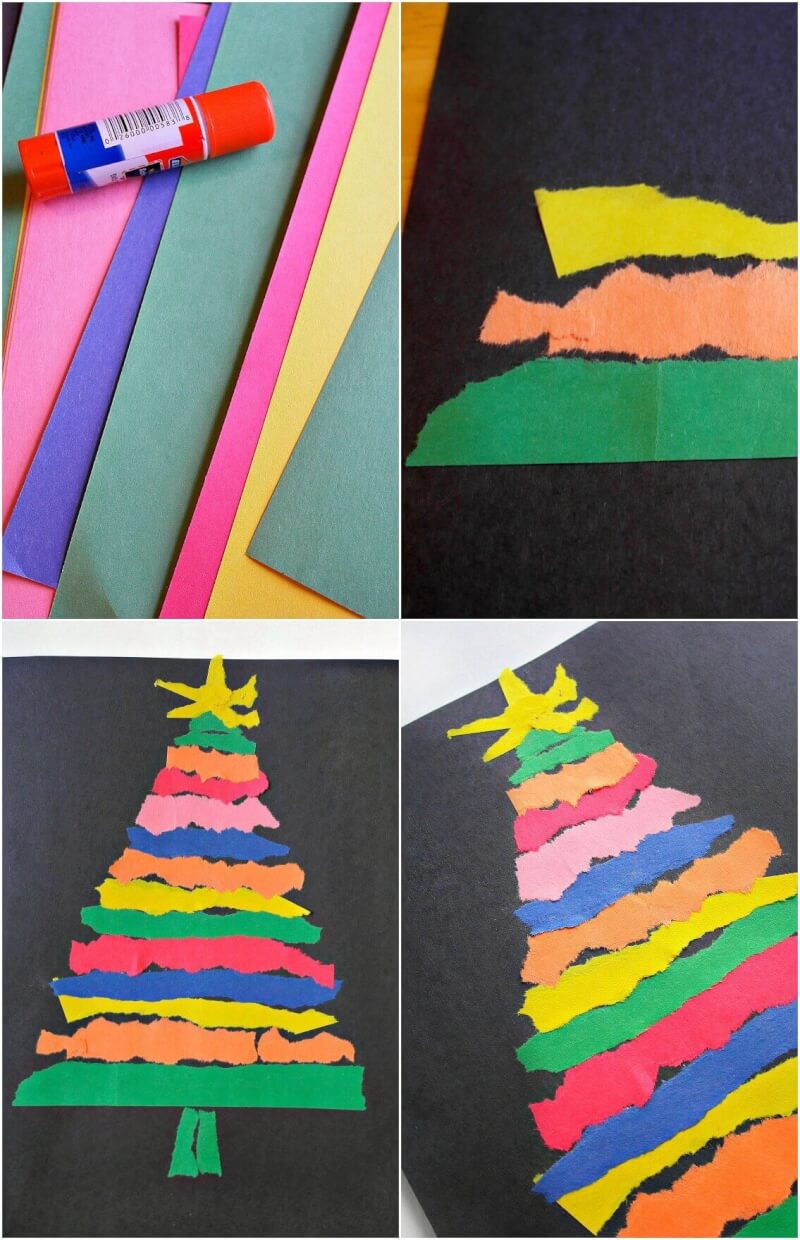
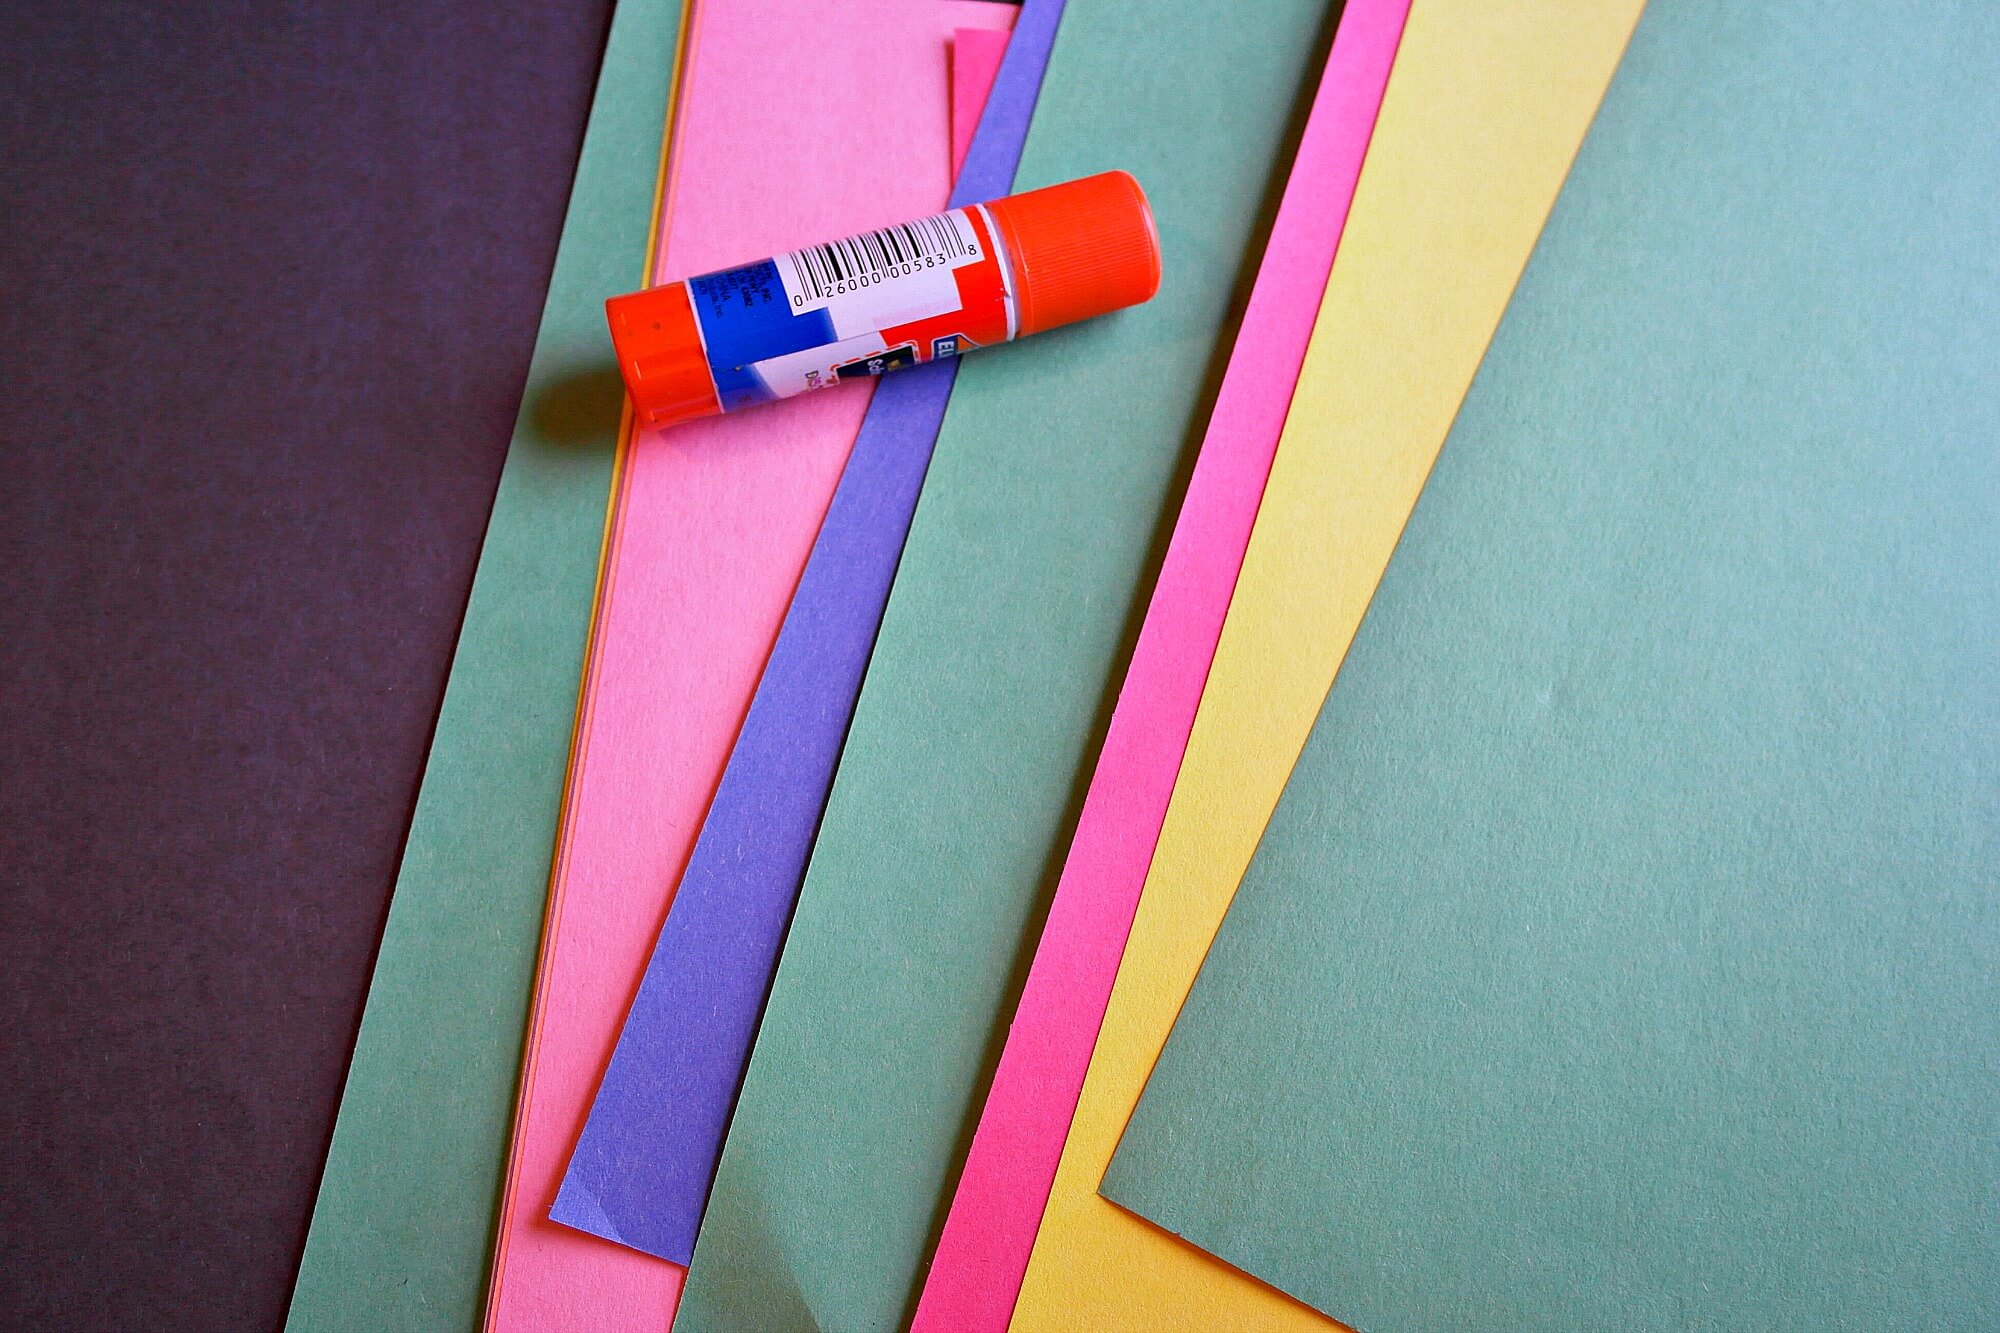
This Easy Ripped Paper Tree Craft uses only two materials and will be fun for all ages.
Creating vibrant and textured paper trees with tissue paper makes it accessible and enjoyable for children.

Ripped Paper Tree Craft
Ripped Paper Tree Craft Materials: Tree Trunk
- Construction Paper
- Glue Sticks
- Brown Paint (optional medium for painting the tree trunk to enhance its appearance) or,
- To make a paper tree, use brown paper for the roots and tree trunk and lighter-weight paper for the leaves.
- Cut out two identical tree shapes from a sheet of folded brown paper to create a paper tree trunk.
- Glue two identical tree shapes together to create a three-dimensional paper tree.
Instructions:
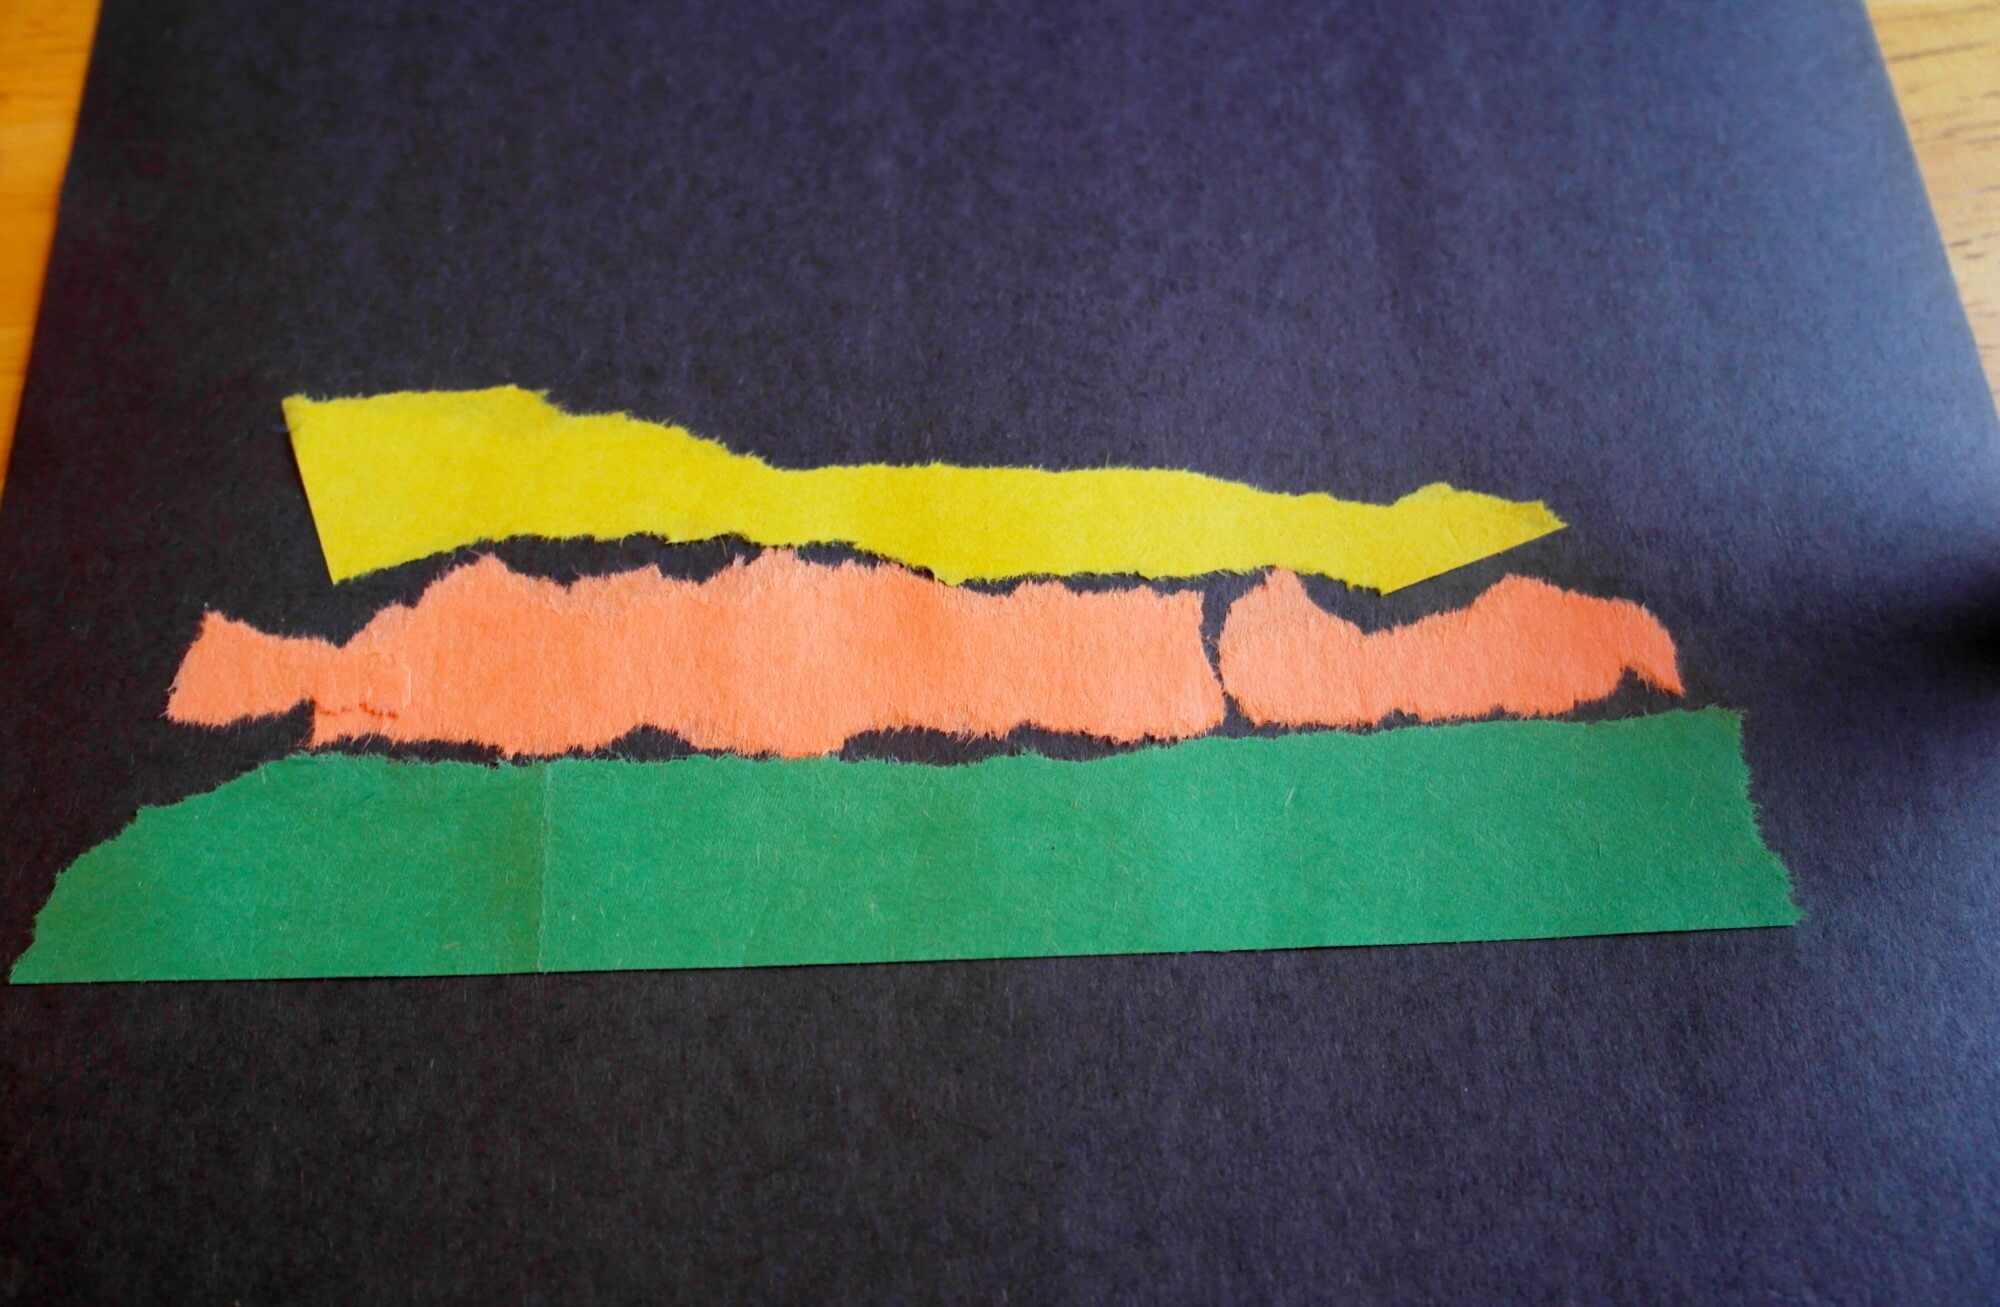
- Attach the Ripped Paper Tree Craft using various colored construction paper and Black paper as the base.
- Black paper will make the colors pop!
- Once you have your rectangle, cut it out and fold it half lengthwise to create room for a crease, ensuring the folded edge is aligned correctly.
- Have the kiddos rip and trim the paper strips by hand in various lengths.
- Cut out leaf shapes, making sure they have a slight dip and curve to mimic real leaves, emphasizing the importance of the shape and design to achieve a more natural look.
- Fringe cut paper strips can be used to trace and create realistic leaves for a paper tree.
- Craft punches can be used to create leaf and flower shapes from paper.
- Fold green paper to cut multiple leaf shapes at once for decoration.
- Start with the longer strips for the bottom of the tree and gradually work your way up the tree to the Star.
Tree Trunk:
The tree trunk is the foundation of your paper tree.
Templates can be printed out on cardstock to create tree trunk shapes. Start by drawing a rectangular shape on brown paper or cardstock, ensuring it’s tall enough to support the tree branches and leaves.
Once you have your rectangle, cut it out and fold it in half lengthwise to create a crease.
This simple fold will give your tree trunk a more realistic, three-dimensional look. Draw horizontal lines across the trunk or use a texture paste to add texture.
This will make your tree trunk look more like real bark, adding authenticity to your paper tree.
Leaves and Assembly:
Grab some green construction paper or any green paper you have on hand to create the leaves for your paper tree.
Green paper for leaves should be lighter in weight than brown paper.
Tissue paper can be cut into squares and glued onto tree branches to create foliage.
Cut out leaf shapes, ensuring they have a slight curve to mimic real leaves.
For a more personal touch, you can use a template or draw the leaf shapes freehand. Once you have your leaves, it’s time to assemble the tree.
Start by gluing the leaves to the branches and spacing them out evenly. Use a glue stick or liquid glue to ensure they stay in place.
Spring trees can have green leaves and paper or felt flowers. Cherry blossom trees are characterized by their beautiful pink or white flowers in spring.
Fall trees or autumn trees can be created with leaves made from yellow, red, orange, and brown paper.
Winter-themed trees are typically leafless and can have a snowy look with white paint on the trunk.
Thanksgiving trees can feature thankful thoughts written on the leaves.
After the leaves are attached, secure the branches to the tree trunk, ensuring everything is firmly in place. Your paper tree is now starting to take shape!
Customizing Your Paper Trees:
One of the best parts about making paper trees is the ability to customize them to your liking.
Use different colors and textures of paper to create a unique and beautiful tree.
Add glitter, stickers, or ribbons to make your tree stand out.
Add details such as tree bark or knots to the trunk for a more realistic look.
Experiment with various shapes and sizes of leaves to create a more varied and interesting tree.
The possibilities are endless, so let your creativity run wild and make a paper tree that reflects your style.

Making it a Family Activity:
Creating paper trees is a fun and easy activity for the whole family.
Make it a collaborative effort by working together on a single tree or by making individual trees and displaying them as a group.
Use this opportunity to teach children about the different parts of a tree and how they work together to create a healthy, thriving tree.
Discuss the importance of trees and their role in our ecosystem.
This activity is enjoyable and educational, making it a perfect way to spend quality time with your family.
Children can make multiple trees to create a whole forest display.
Displaying Your Tree:
Once your paper tree is complete, it’s time to show it off! Display your beautiful tree proudly in your home or office.
Place it on a shelf or mantle, or hang it using string or fishing line from the ceiling.
For a dramatic effect, create a whole forest of paper trees and display them together in a large vase or container.
You can also use your paper tree as a centerpiece for a table or as a decoration for special events or holidays.
No matter how you display it, your paper tree will surely be a unique and eye-catching addition to any space.
Final Ripper Paper Tree Craft Instructions:
Use shorter lengths of paper as you build your way up to create the triangular tree look.
Rip short yellow paper pieces and place them around the top of the Ripped Paper Tree Craft to be the star!
Allow your paper tree to dry thoroughly before you carry it around the house, and proudly show it to the whole family.
Making paper trees is a great way to pass the time on a rainy day.
Children can create trees in various colors, including non-traditional ones like blue trunks and rainbow leaves.
Kids can engage in fine motor skills activities while crafting paper trees and birds.
It is as easy as that! You now have a Paper Tree Craft!
Please tell us what you did to make this different – comment below!
Check out this related reading; Crazy Easy Easter Craft that You Can Make Today , Easy Fall Kids Craft Apple and New Year’s Eve Craft for Kids Paper Shaker.


Hi Melissa, What a wonderful craft idea! I plan to make this with my little step-granddaughter. Thanks for the inspiration! Blessings, Janet
very cute! I can’t wait to do this with my toddler 🙂 Visiting from Pinworthy Projects 🙂
This is such a fun idea! My kids would really enjoy trying this out. We’d love to have you share this at our weekly link party. http://www.thelifeofjenniferdawn.com/2016/12/rustic-christmas-farmhouse-decor-weekly.html Hope to see you there!
This is an adorable Christmas craft! Nice and easy for kids, thanks for sharing at Merry Monday!