My mother-in-law posted a link on Facebook the other day detailing how to make something called Polish Star Ornaments.
I watched the video and immediately fell in love with these easy, yet beautiful ornaments and thought how wonderful they would look on my Christmas tree.
They would also make super cute gifts!
Table of Contents
Tradition of the Polish Star
In the Polish tradition of celebrating Christmas, the star has special significance.
On Christmas Eve the first star of the night is named “Gwiazda,” meaning “little star,” in remembrance of the Star of Bethlehem.
At the moment it appears, greetings and good wishes are exchanged.
Families then partake of the Christmas supper, “Wigilia,” the most carefully planned meal of the year.
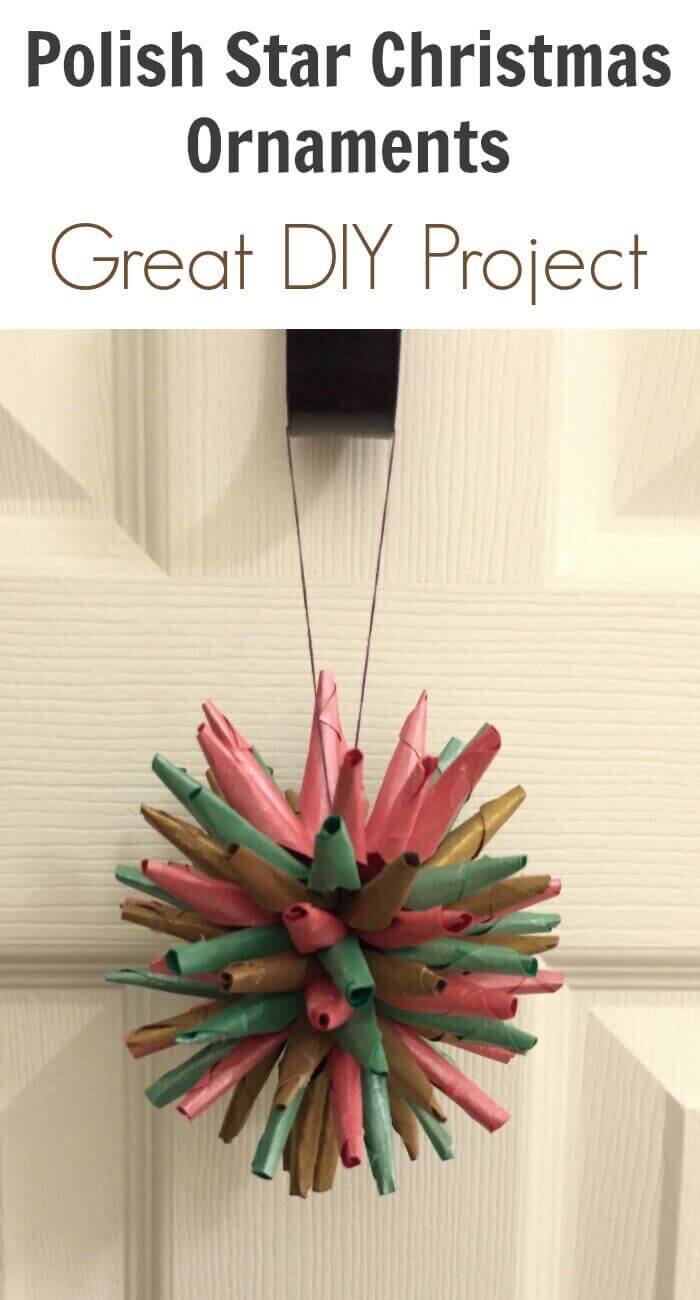
Polish Star Ornaments
You will need the following supplies to make your Polish Star Christmas Ornaments:
- A pen or pencil (to form the points)
- Something sharp to poke a hole through the center of each piece of paper, I used a sewing needle, a toothpick would work too. If you use a compass to draw your circles, you can use that to poke a hole through the circles of paper.
- Scissors
- White Glue (to glue the points)
- Jewelry Cord (to hold the pieces together, string, twine, ribbon etc. can also be used)
- 2 Jewelry spacing beads, sequins, etc. (to keep the cord on both ends taught)
- 5 Sheets of 8.5 x 11 Paper (scrapbook paper, wrapping paper, printer paper, brown shipping paper etc.)
- A Compass or object you can use to draw around about 4″ wide, I used a cardboard ribbon spool
- A Compass or object you can use to draw around about 1″ wide, I used a nickel

Instructions:
1. Use a 3″ – 4″ circle (I used a cardboard ribbon spool that is roughly 3.5″) and draw 4 circles onto a piece of paper. Next, use your .09″ – 1″ circle (I used a nickel) and draw the inner circle in the middle of the larger circle. Do this on the remaining pieces of 8.5 x 11 pieces of paper for a total of 10-20 large circles. Or use the template found here.
2. Cut the larger circles out. Then Fold the circle in half, fold a second time in half (1/4), then a third time in half (1/8).
3. Open your circles up. In the center of the circle punch, use a needle, toothpick, etc. to make a hole.
4. Cut along the folds almost to the center, but not quite all the way. You can see in the photos below where the cuts are made.
5. Put a small dab of glue on the point of one tab, then wrap the tab around a pencil or pen hold in place for a few seconds so the glue sets, do this for all 8 tabs. You can also do this without using a pen or pencil as seen in the youTube video posted at the bottom.
6. Slip a spacer bead onto your jewelry cord halfway down the cord (you can also use string, twine, thin ribbon etc.). I didn’t take a photo of this, so I used the diagram from diohomeimprovements.com.

Photo Credit: diohomeimprovments.com
7. Draw both ends of the cord together, slip both ends through your first piece of paper making sure this piece of paper has the point side facing up so the bead is on the back side (see photo below). Then, slip both ends through the rest of your pieces of paper with the points facing down (opposite of the first piece you put on/see photo below). Do this for all remaining pieces of paper.
Points Facing Up:
Photo Credit: diohomeimprovements.com
Points Facing Down:
Photo Credit: diohomeimprovements.com
8. After putting your last piece of paper onto your cord, put your second spacer bead through one side only of the string, pull both strings taut so it will cause the pieces of paper to scrunch together. Then, tie the string into a knot where the spacer bead is.
9. Tie another knot where the two ends of the cord meet. This will create your loop to hang the ornament on your tree!
Photo Credit: diohomeimprovements.com
And for you visual learners, here is the video that I watched to make mine:
And that’s it! Now you can make your very own Polish Star Christmas Ornaments!
I hope you like them and I’d LOVE to see your finished ornaments!
Please share!
Check out these wonderful Christmas articles; Easy Ripped Paper Tree Craft, How Stay at Home Moms Can Save Money for Christmas ,Toys My Kids will Never Have, 70+ Inspirational Barbie Quotes for Kids – Trending in 2023 and 10 Things that go On Sale after Christmas.


Really helpful thanks
That is so pretty! I’m sure it required quite a bit of patience though. 😉 My grandparents were polish but I’m not sure I had heard of the Polish Star. Thanks for the introduction! Visiting from Talk of the Town party.
Very pretty! Don’t know if I’m coordinated enough to do it but I love the look. Pinned and shared.
What a pretty ornament! Thank you for sharing at Merry Monday!